Hi Everyone....its a lovely weather at my place with rains and rains remind me of school days ...splashing dirty water on friends and making paper boats etc...there is something else that brings back good old arty sessions of school days to my mind....CRAYONS!!!
Crayons have been our favourite first timer art supplies....and I remember scribbling them on any paper that was at my hands reach!!! So just remember those days and move on to create your own pattern paper!!!
Am sharing a tutorial I did long back so please note: that the technique should be used to make PP...and some samples of the same are shown below ....but I have shown the technique by creating a card with buttons etc....that is not a part to be done for the swap!!! You can instead use sketch pens and markers to add more details and doodling though!!!
Okie
lets start.....You need Crayons, Cardstock (Preferably White but you
could try on pastel coloured cardstock too), Stamps, Inks, Paper Towels
or Tissues and an Iron!!! Yesss you read it right.....IRON!!!!
Ooops
sorry forgot to include the most important thing in the picture :( the
crayons......anyways I used Faber Castel Oil Pastels.
Now
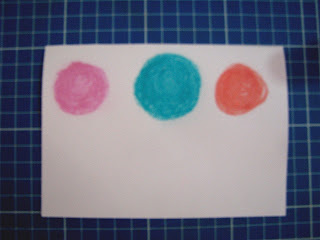
take a white cardstock and start making circles with the
crayons.....and feel like a toddler :)....You can do any geometric shape
or heart or anything..but I love Circles for some weird reason
sooooooo...
Once you finish this is how it will look!!!
I was doing many designs together so will do the same here too....:)
After you finish with this......heat your Iron on one side and take out the paper towels or tissues.....
Cover the entire Cardstock with the Paper Towel or Tissue like below
And
then Iron on it......I used my old Iron as I was scared that I would
spoil my other nice ones...but there's nothing to fear !!!
This
is basically to melt the crayons and tissue is added so that the extra
colour is absorbed by it....keep ironing till the crayon circles turn a
little chalky in feel than the waxy/oily original feel of theirs .....
You
can check by touching it....if you get the colour on your finger tip
and it seems like chalk its done!!! Make sure the oilyness is gone or we
cant stamp on it!!!!
Now for the next step......the messy part :)
I like a smudged look to just took a tissue and blended the colours ...all into each other!!!
It MAY NOT look all that good and nice now but there's nothing to worry ....wait and watch!!!!
The second one I didnt do a smudged feel .....just took off the extra chalky colour through the tissue!!!
Now we shall proceed with the Stamping Part of it!!!!
My CTMH stamps on work with her CTMH inks and acrylic block.....
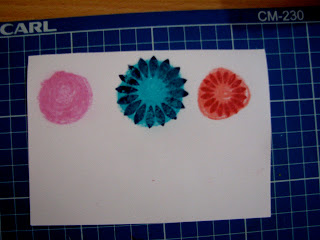
Stamped!!!
Dont worry about crayon showing unevenly on sides etc..it doe snot matter at all.....the overall effect is what matters ....
Continue
the same way with the other circles.....and yess I forgot please use
those crayons colors on which your stamp inks will show....dont use very
dark colors .....stamping will not show on them!!!
The final look after stamping!!!
Optional
Supplies needed are sketch pens or fine tip pens ...to make the stem
and leaves ....you could do it with felt paper...scraps of
paper....punch craft ...options are many..suit yourself!!!!
I
used buttons too .....you could use glitters or glitter glue pens etc
for the middle round ....also could add bling border to leaves etc as
per your imagination and creativity....options are endless....
I trimmed the sides a little and mounted it on a cardstock to make a card.....simple and easy isnt it????
A closer look !!!
You can also use this technique to create pattern paper for layering etc....like I plan to use .....
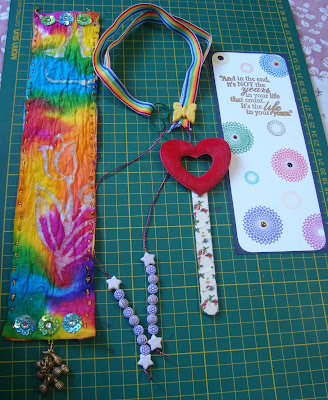
(for the swap make items like the below pictures !!)
Love the effect.....how about you???? Have a look at the others too that I did.....
The next one does not use the stamping effect ....its with plain fine tip pens!!!!
In all the patterns you can add glitters ...bling etc etc as mentioned earlier to enhance the pattern!!!
Hope
you like the technique and also do hope that I was crystal clear in the
step by step procedure ....
In case of any confusion do write to us and we shall be happy to answer the queries!!!
Hugs
The BB Gossip Gurls


